
Note: This article is part of a two part series. You can read Part 2 here.
The articles these past few weeks have focused on digital music with a heavy emphasis on converting your CD collection into a digital music library. Chances are, you have amassed a fairly large collection of music files. If you own an iPod, be it a Nano or the iPod with Video, you probably have more music on your computer than you can fit on your portable device. This makes managing the music that goes onto your portable music player extremely difficult. As a result, you are often times left wanting to listen to a song or album you do not have on your device at the time. Fortunately, iTunes gives us Smart Playlists (Microsoft calls them Auto Playlists in Windows Media Player). With a series Smart Playlists we can control what music goes onto our portable player at all times and managing 3-4 playlists is a lot easier than managing thousands of individual files. In this week’s tech article, I am going to show you how to use Smart Playlists to easily manage a portable music library on your portable music player.
Before we begin though, I need to clear up a few things. For starters, I assume that you have your ID3 tags in your mp3 files as accurate as possible and that you also have as much information you could find included. The more information you have in your ID3 tags and the more accurate it is, the better playlists you can create. I also need to state before we begin that I will focusing on iTunes’ Smart Playlist feature rather than Windows Media Player’s Auto-Playlists. This is for two reasons; one, I am more familiar with iTunes’ Smart Playlists and two, what little experience I have with Auto-Playlists did not leave me liking it a whole lot. In my opinion (other people’s mileage may vary) the Auto-Playlist feature of Windows Media Player does not give you the same level of control that Smart Playlists does. Smart Playlists utilizes almost every editable field in their Smart Playlist creation dialog, while Auto-Playlists only deals with a handful of fields leaving out several important ones.
With that disclaimer out of the way, lets take a look at the basic Smart Playlist dialog and get familar with it. You can click on the images to view the full size versions.

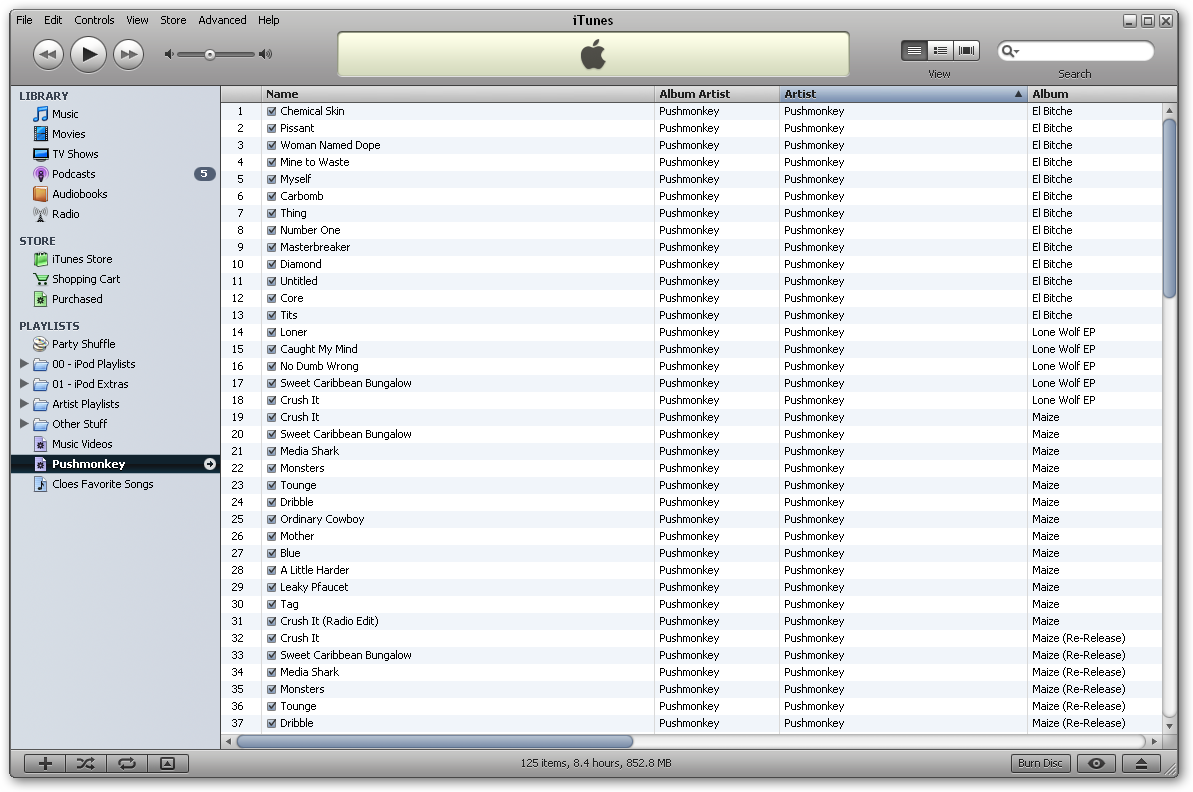
As you can see, everything is pretty straight forward, You have the field, the condition, and the value. You might also notice the plus and minus buttons, these are to added or remove “queries” from your smart playlists. So lets start with a simple example. Below you will notice that I have selected Artist as my field, the conditions is set to “is”, and finally my value is set to “Pushmonkey.” This smart playlist will include every song with and “Artist” set to “Pushmonkey”
This example is probably the simplest Smart Playlist you can create. It has only one set of criteria and the “Live Updating” flag checked. The more of your tags that are filled the better and more accurate Smart Playlists you can make. Lets take one of my personal Smart Playlists that I carry around on my iPod.
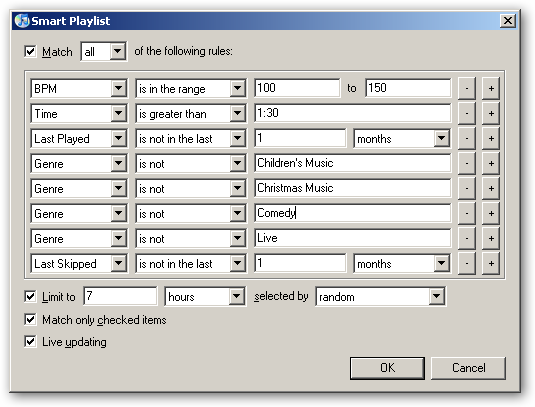
As you can see this playlist gets somewhat complex. I use a variety of criteria and then use all kinds of settings at the bottom. One of the most important things in this Smart Playlist is the “Limit to” checkbox. By using the “Limit to” checkbox I have told the Smart Playlist to only select seven hours of random music. The resulting playlist is 6 hours and 59 minutes long. You might also notice that I tell it not to include a bunch of genres, this is so I do not get non-music included in my playlist.Most people, when they create Smart Playlists, the focus on the criteria and ignore the power of the checkboxes. Yes, the criteria is important and you need it to determine what kind of Smart Playlist you create but it is the checkboxes that really give you the power of what actually happens. Below is a table that tells you what each checkbox does.
| Checkbox | Use |
| Match | You have 2 options here: “Any” and “All”. “Any” pulls songs that match any of the listed criteria while “All” means a song has to match every condition that follows |
| Limit to | Limit to allows you to limit the number of tracks in the playlist through various means including: minutes, hours, megabytes, gigabytes, and songs. |
| Match only checked items | You can check and uncheck individual tracks in iTunes, allowing you to only check the songs you’d listen to. When you match only checked songs, if a song is not checked then it does not get included in the playlist |
| Live update | Live update means that as tracks are played, added, and removed from the iTunes library they are added/removed from the playlist. |
It is really these checkboxes that give Smart Playlists so much of their power. So you definitely want to experiment with these to get playlists that work for you. I use Smart Playlists to manage my iPod since I have a 60GB iPod and over 80GB worth of music. Editing only a few playlists and then letting 3 or 4 playlists fill in the music allows me to put around 40GB of music on my iPod leaving me enough for videos, photos, and drive space for transporting files around.Next week, we will go over exactly how to use Smart Playlists to manage your portable digital music player.
There is more in part two of this series. You can read Part 2 here.
[Technorati Tag: Technology]
[Technorati Tag: Music]
[Technorati Tag: iTunes]
[Technorati Tag: Playlists]


